10 camera settings you need to learn to master your Nikon
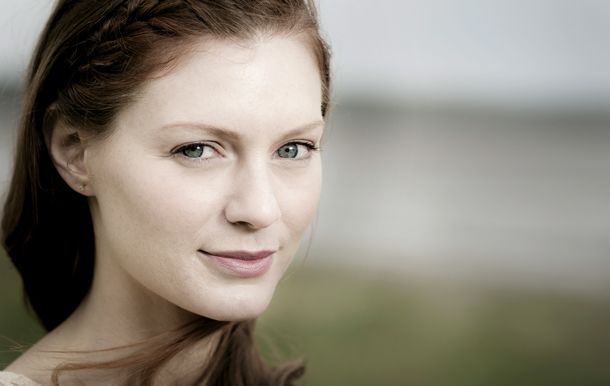
Essential Nikon camera settings: 1. Focus lock
Even the most sophisticated autofocus systems need you to take control in order to focus on off-centre subjects
What is it in a nutshell?
Positioning your subject off-centre is one of the best ways to improve the composition of your shots, but you need to make sure that your Nikon focuses on this area rather than what's in the middle of the frame, otherwise you could end up with your subject out of focus and your background pin-sharp (a problem common to compact camera users). With static subjects, the easiest way to do this is to use a technique known as focus lock.
Why is it so important?
Focus lock is the perfect technique to use when you want to vary the composition by positioning the subject in different areas of the frame.
Once you have locked the focus, you can position the subject anywhere in the frame, and as long as you remain the same distance away, it will be sharp.
This is useful on cameras which have a limited number of AF points, as they only allow you to focus on a limited number of areas within your scene. Using focus lock, you can place the subject in areas of the frame where there aren't any suitable AF points.
How do you use it?
To use focus lock, you need to set your camera to single shot autofocus mode (AF-S). Then, frame the scene so your subject is in the centre and half-press the shutter release until the camera focuses.
You can then recompose your image so that the subject is anywhere in the frame, but you must keep your finger half-pressed on the shutter release, and make sure that you don't change the distance between you and the subject. Then, once you're happy with the composition, you can press the shutter fully to take your shot.
What you can ignore: Auto AF point selection
Like many automatic functions, the automatic AF point selection can work perfectly well, but it doesn't always pick the AF point that corresponds with the thing that you want to focus on.
You'll get more reliable and consistent results by choosing the AF point manually (see Taking it further), or simply leaving it set to the central AF point and using the focus lock technique described above.
Taking it further: Manual AF point selection
While focus lock is a simple and effective method of focusing on off-centre subjects, it's not always the most convenient option. If your subject is consistently going to be in the same off-centre position for a series of images, you should manually select an AF point that corresponds to that position within the frame.
Essential Nikon camera settings: 2. Focus Tracking
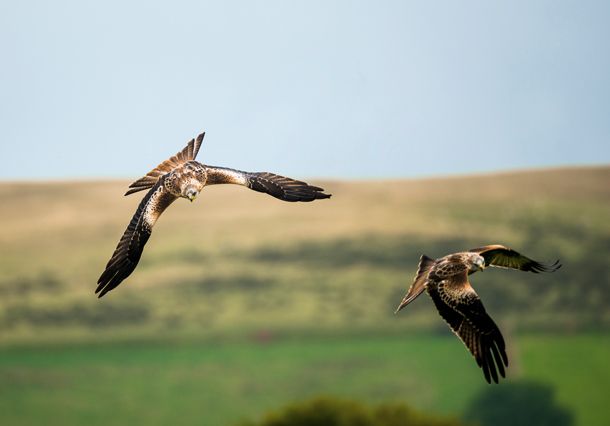
When you're shooting moving subjects you need to choose the right focus mode to keep them sharp. Here's how…
What is it in a nutshell?
There are three main autofocus modes on Nikon DSLRs: single, continuous and automatic. If you want to track a moving subject you need to select the continuous autofocusing mode (AF-C).
In this mode the camera will continuously adjust the focus whenever the shutter release is half-pressed, enabling it to track subjects that are moving towards or away from your camera.
Why is it so important?
Shooting moving subjects is a challenge for any focusing system, so you need to choose the right mode in order to give yourself the best chance of keeping your subject sharp.
Even though the automatic AF mode will switch between single and continuous AF when it detects a moving subject, it's still better to switch the camera to AF-C mode so that it will continuously track moving subjects.
In continuous mode the camera automatically switches to predictive focusing; this analyses the movement of the subject and tries to predict where it will be at the exact moment when you fire the shutter.
It's not completely foolproof, particularly when the subject is moving erratically, but it still gives you the highest hit rate of any AF mode for moving subjects.
How do you use it?
Once you have chosen AF-C mode, the camera will automatically adjust the focus for as long as you keep the shutter release half-pressed. To use this mode successfully, it's important to keep the focus point positioned over the subject for as long as possible, otherwise the camera will focus on another part of the scene, and you'll then need to reframe and refocus, which can mean that you miss the perfect moment.
What you can ignore: 3D AF tracking
This focusing mode relies on the focus locking on to the subject, and it will then move the focus point automatically if the subject moves in the frame. This can work well in some situations, but the camera will always struggle to identify the main subject if it's close to the background or contains similar tones and colours to the surroundings.
Therefore, in most situations it's often better to use a single AF point, and keep this positioned over the subject for as long as you possibly can.
Taking it further: Back-button focusing
If you're shooting fast-moving subjects, it can be difficult to keep the autofocus activated and take pictures at the same time.
The solution is to set up your Nikon so that focusing is activated by a button on the rear and not the shutter release; this is known as back-button focusing. Pro models have a dedicated button for this, but on most other models you can assign the AE-L/AF-L button to it.
Essential Nikon camera settings: 3. Exposure Compensation
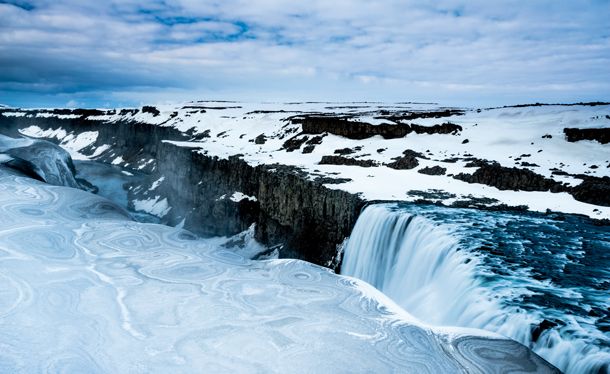
Want to take more control of exposure, but don't know where to start with manual mode? Exposure compensation is much easier to use, and much more intuitive as well…
What is it in a nutshell?
Exposure compensation is essentially a way of brightening or darkening shots in aperture-priority, shutter-priority, or even program mode without having to resort to manual exposure.
This is ideal for those situations where the camera's automatic metering produces under- or over-exposed results, such as when shooting very light or very dark subjects.
Why is it so important?
Even a metering system as sophisticated as Nikon's 3D Matrix metering system can be fooled into under- or over-exposing when the subject contains a large amount of dark or light tones. Learning how and when to use exposure compensation is a vital tool in your armoury for getting spot-on exposures.
There are many situations where this can be useful, but the classic is when the background is much darker or lighter than the subject you're shooting, such as a person standing against a window. In these cases, exposure compensation is perfect for ensuring that your subject is correctly exposed, rather than the background.
How do you use it?
You apply exposure compensation by holding down the +/- button on the camera body, and then using the rear input dial to set the amount of compensation required. The settings that this affects will vary depending on which exposure mode you are using.
If you're using aperture-priority mode, for example, the aperture value will stay the same, but the shutter speed will change to let in more or less light. The opposite is true when you're shooting in shutter-priority mode; in this case, the shutter speed will remain unchanged but the aperture will vary, again to let in more or less light.
All you need to remember is that positive exposure compensation brightens images, while negative compensation darkens them.
Exactly how much exposure compensation you need to dial in will vary depending on how much of the scene is light or dark, but a good starting point is to set + or - 1, and then take a test shot.
What you can ignore: Auto exposure lock
Exposure lock (AE-L) is another way to control the exposure in all auto exposure modes, but in order to use it you have to point the camera at a subject that contains mostly mid-tones, lock the exposure using the AE-L button, and then recompose your image. This isn't convenient in most situations, so it's usually better to use exposure compensation.
Taking it further: Exposure bracketing
Judging exactly how much exposure compensation to use can be tricky. One option is to set up your Nikon to capture a series of images, each using different amounts of compensation.
You need to select the number of shots (three is usually enough) and the amount of exposure compensation (start with +/- 1). Then press the shutter release three times, and your camera will take a series of shots at -1, 0 and +1.
Learn more: The A to Z of Photography: Exposure compensation
Essential Nikon camera settings: 4. Histogram display
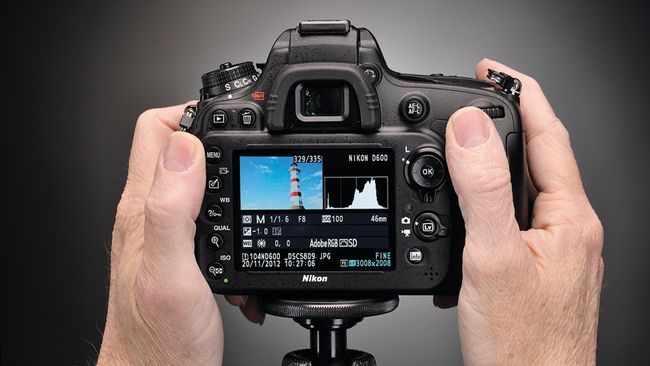
Judging the exposure from the image alone is difficult, so your Nikon has a display mode to help you get it right
What is it in a nutshell?
The histogram is a graph that shows you the distribution of tones within an image. The shape of this graph will vary from shot to shot, but it's the distribution of the graph, and its position along the bottom axis, that are the key elements when it comes to gauging the exposure of your shots.
Why is it so important?
Understanding the histogram will enable you to fine-tune your exposure to make sure that you capture the maximum amount of detail in the tones of your images. The horizontal axis shows you the brightness of the tones in the image, from the darkest black on the extreme left to the brightest white on the right.
The areas in between these two extremes are the tones that will be correctly displayed in your image. If the graph goes over the right-hand edge, there will be areas where the highlights will have no detail, while if it goes over the left-hand end, it will be the shadows that have no detail.
How do you use it?
To display the histogram when you review images on your Nikon, press the Play button and then toggle the top or bottom of the rear control pad to scroll through the different display modes, until the histogram is displayed alongside the image.
If the graph is bunched to the left, with a gap to the right, then the image is under-exposed (unless the subject is very dark), so you should increase the exposure on the next shot; if it's bunched to the right, with a gap to the left, it's over-exposed, so you need to reduce the exposure.
If you're shooting a very high-contrast subject you may end up with a histogram that overlaps both ends of the graph. In these situations you can't keep detail in both the highlights and the shadows in a single shot, so you'll have to decide which is more important in your image.
It's usually best to set the exposure so that the highlights reach the right-hand end of the graph, and then 'let the shadows fall where they may'.
What you can ignore: RGB histograms
Along with the normal histogram display, there's the option to display separate histograms for the red, green and blue (RGB) colour channels.
This gives you even more information about the individual colours, but in most situations this isn't necessary for getting a correct exposure, and having to check three graphs, rather than just one, can make it more difficult to spot under- or over-exposure.
Taking it further: Highlight warning
Along with the histogram, there's another display mode available on your Nikon that can help you retain detail in your shots. The Highlights (or Clipping) warning display alerts you when the very brightest areas of the scene are over-exposed.
These areas will flash black and white, indicating that you need to reduce the exposure if you want to keep detail in these highlights.
Essential Nikon camera settings: 5. Burst mode
What is it in a nutshell?
Most Nikons have two main drive modes, single and continuous. In single shot drive mode, your camera will take one shot when you fully press the shutter release, but won't take another until you lift your finger off the release and press it again.
This is perfect if you only want to take one shot at a time, but for moving subjects it's often better to switch to continuous shooting mode, as this enables you to fire off a burst of images when you hold down the shutter release.
Why is it so important?
Capturing the decisive moment when shooting action or movement is partly about timing, but you can increase your chances of getting that special shot by selecting continuous mode and taking a sequence of images one after the other.
You can use continuous mode when shooting static subjects, but it's best to stick to single shot drive mode; in continuous mode it's very easy to leave your finger on the shutter and fire off a burst of identical images unnecessarily, using up both time and space on your memory card.
How do you use it?
Once you've set continuous drive mode it's not just a case of keeping your finger on the shutter release and hoping you'll get the shot. The best way to use this mode is to shoot in short bursts, normally of around three to five images, at the height of the action.
This will help prevent you simply taking loads of unnecessary images, and also keep the camera's image buffer as clear as possible, so it's always ready to capture a shot.
What you can ignore: Custom frame rates
Many Nikon DSLRs allow you to set custom frame rates, but this isn't necessary for most situations. They might help you to keep shooting for longer without filling the image buffer, but you will normally want the fastest frame rate possible to ensure that you can capture the height of the action. In general, it's far better to shoot in short bursts than to lower the frame rate.
Taking it further: Continuous mode for macro
Burst shooting is a great way of ensuring you get pin-sharp shots when focusing is critical, such as with macros, particularly when shooting handheld. By shooting in a short burst just as the subject comes into focus in the viewfinder, or on the LCD in Live View mode, you can increase your chances of getting one sharp shot. This technique is invaluable if the subject is moving.
Essential Nikon camera settings: 6. Vibration Reduction
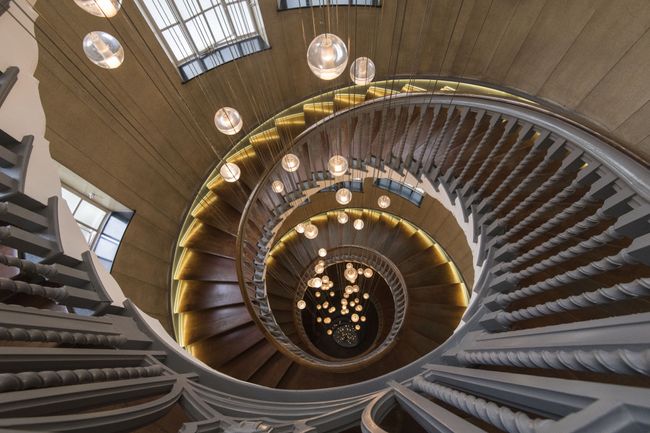
Getting sharp results isn't just about focusing - you also need to avoid camera shake, as that may blur your shots
What is it in a nutshell?
Blurred images due to camera shake are caused by your camera moving during the exposure. This is most common when you're holding your camera to shoot, and using a shutter speed that's too slow to 'freeze' any camera movement.
The longer the focal length of the lens, the more any movement is magnified, so the faster the shutter speed you need to freeze the movement of the camera.
Many Nikon lenses have a feature called Vibration Reduction (VR) that will reduce the effects of camera shake by moving the elements within the lens itself to compensate for any movement of the camera.
Why is it so important?
Vibration Reduction essentially enables you to use shutter speeds much slower than would normally be possible and still get sharp results, so it's ideal in low light, for example.
There is a limit to how much vibration reduction systems can do, though, so if you're planning to use very long shutter speeds, or very long lenses, then it's still worth using a tripod (or monopod) to maximise your chances of getting sharp results.
How do you use it?
The VR system is activated by a switch on the lens. Once it's switched on the system uses 'floating' elements within the lens to compensate for any camera movement.
The shutter speed needed for avoiding camera shake without VR will vary according to the focal length of the lens you're using.
With an FX (full-frame) camera like the D750, the rule of thumb is that you need a shutter speed of 1/focal length to prevent camera shake; so for a 200mm lens you should use 1/200 sec or faster. But with a DX model like the D3400, it's best to use an even faster shutter speed, as the effective focal length will be 1.5 times longer (in other words, 300mm rather than 200mm).
Once you've activated the VR system you can use slower shutter speeds, but there's still going to be a limit to how slow you can go. VR systems will usually allow you to shoot around three stops slower than normal, so if you would normally need to shoot at 1/250 sec to get sharp results, then you should be able to shoot at 1/30 sec with VR.
What you can ignore: VR when using a tripod
Vibration reduction becomes completely redundant once you've fixed your camera to a tripod. Even though the systems in many modern lenses are designed to switch off automatically when they don't sense any movement, it's still worth turning them off when you are using a tripod.
This will prevent the VR from activating if there's a small movement, such as when you adjust the settings or reframe your shot, which can potentially cause your shot to be blurred, as the VR will move the elements inside the lens.
Taking it further: Mirror lock-up
Even when your camera is on a tripod and you're using a remote release, the movement of the mirror when you fire the shutter can create enough vibration to blur the image. Many Nikons have a mirror lock-up feature to prevent this.
To use this, select mirror lock-up mode, press the shutter release to lock the mirror out of the way, and then press the shutter release to take your shot.
Essential Nikon camera settings: 7. Shutter Priority
What is it in a nutshell?
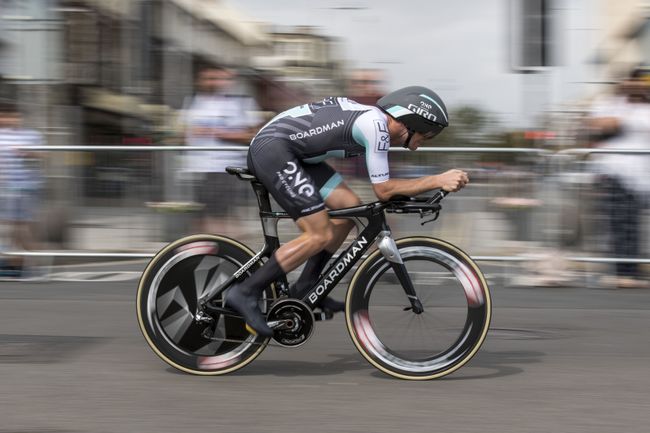
Choosing whether to capture moving subjects as sharply as possible, or with some blur, is a critical. For maximum sharpness you'll need a fast shutter speed, usually 1/500 sec or less. At these speeds there needs to be plenty of light, or you have to increase the ISO.
Why is it so important?
It's usually important that the main subject is sharp, but using fast shutter speeds to freeze movement can also create images that reveal details that are invisible to the naked eye.
That said, the down side to freezing movement is that the subject can appear static, so you need to use this technique with care.
For the best results there needs to be some aspect of the subject that implies movement, so look for moments when your subject leaves the ground, kicks up dust or spray, or is in a position that would be impossible if it were standing still.
How do you use it?
Shutter-priority exposure mode is perfect for giving you control over the shutter speed in most situations. In this mode you can select the shutter speed via the input dial, but this doesn't mean that the camera can always choose an aperture that will give you the correct exposure.
When using fast shutter speeds to freeze movement, you need to watch the aperture displayed in the viewfinder, and if it starts to flash (and the exposure scale displays a negative value), it means that there isn't enough light for a correct exposure, even at the widest aperture available on your lens.
In this case you will need to set a higher ISO - do it in stages until the display stops flashing.
What you can ignore: Extremely fast shutter speeds
Nikon DSLRs offer maximum shutter speeds of 1/4000 sec or even 1/8000 sec, but these speeds are rarely useful in real-world situations.
Most moving subjects can be frozen by speeds of 1/2000 sec or slower, and you'll need extremely bright conditions, a wide aperture and a high ISO setting to use shutter speeds faster than this. It's much better to use high-speed flash to freeze subjects like water splashes or other extremely fast-moving objects.
Taking it further: Slow shutter-speed effects You don't always have to freeze movement; using a slow shutter speed to add some blur can add a sense of movement and action to a photograph.
There are many ways that you can do this, such as panning with a moving subject to blur out the background (right), or keeping the camera completely static and blurring any elements of the scene that are moving during the exposure. Which technique you use really depends on the effect you're trying to create.
Essential Nikon camera settings: 8. Aperture Priority
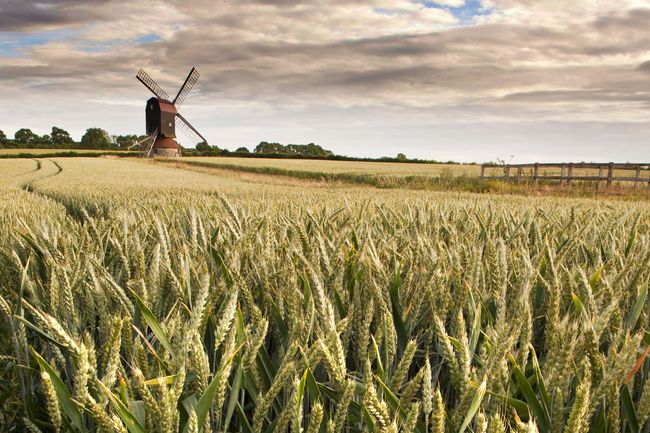
Deciding how much of the scene is in focus can make or break the impact of your shots, so here's how to control it
What is it in a nutshell?
The amount of a scene that's sharp in front of and behind the focus point is known as depth of field. Depth of field is affected by three factors: the aperture, the focal length of the lens, and the distance between your camera and the subject.
Once you have decided on a composition, the focal length and the distance will remain almost constant, so the main variable that you can control to alter the depth of field in your shot is the aperture.
Why is it so important?
Along with choosing the shutter speed, controlling the depth of field is one of the most important creative decisions you have to make when you're taking a photograph.
Keeping the whole scene sharp is typically used in landscape photography and architectural photography as it's important that the viewer can see everything clearly, but many other subjects, such as portraits or flowers, will often benefit from using shallow depth of field to help isolate the subject from the background.
When you're using shallow depth of field it's important to remember that you don't always need to use the widest possible aperture, particularly if you're using a lens such as a 50mm f/1.8.
You can run the risk of the depth of field being so shallow that too little of the subject is sharp to result in a pleasing image. It's always worth checking that you haven't gone too far.
How do you use it?
The best way to take control of the depth of field is to set your camera to aperture-priority mode. You can then use the input dial to select the aperture you want, and the camera will automatically select the shutter speed for you.
You need to use large apertures, such as f/4 or f/2.8, to get images with very little in focus in front of and behind the focus point, and small apertures, such as f/11 or f/16, when you want to keep as much of the scene in focus as possible.
What you can ignore: Very small apertures
While using a lens's smallest aperture (usually something like f/22 or f/29) will result in images with the maximum depth of field, it's not always a good idea to use very small apertures if you're aiming to get the sharpest possible results.
This is because the image can be affected by an optical effect called diffraction, which actually reduces the sharpness.
Unless you really need such a small aperture to keep absolutely everything in focus, you should use a slightly larger aperture, such as f/16 or f/13, to ensure the sharpest results.
Taking it further: Finding the 'sweet spot'
Lenses don't produce the same sharpness at every available aperture. At wide apertures you'll find that the centre of the image is sharp, but the edges are soft, while at small apertures the whole image lacks sharpness.
If you are after the best quality, it's worth setting up your camera on a tripod to shoot a flat subject (ideally a test chart). Then shoot it at different aperture values, and check the sharpness at 100% on your display, to find the best aperture to use. This known as the 'sweet spot' of the lens.
Essential Nikon camera settings: 9. ISO
What is it in a nutshell?
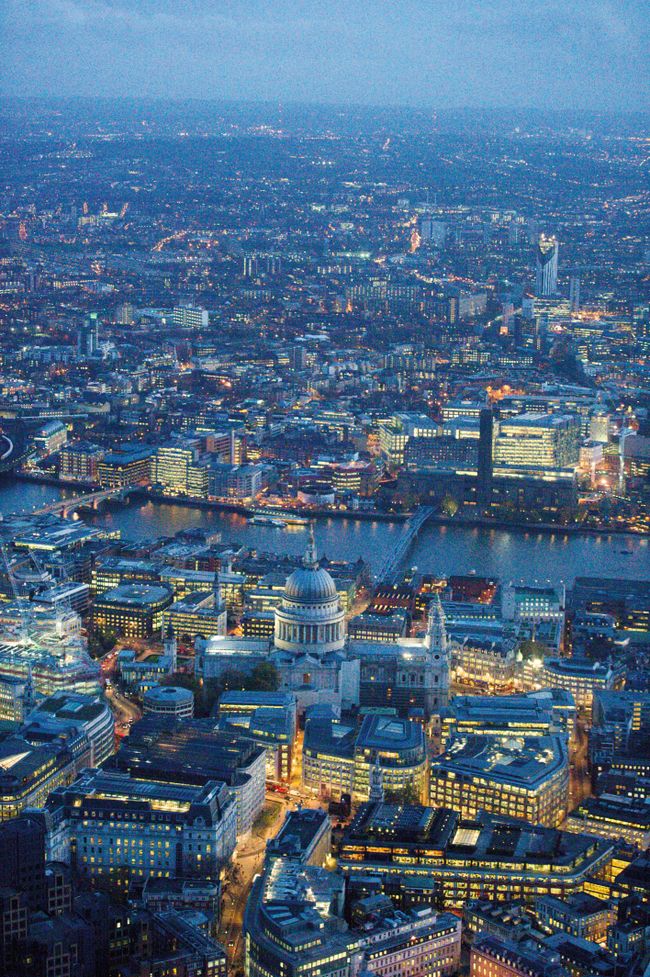
ISO is simply a measure of how sensitive your camera's sensor is to light - at high ISO settings, such as 800 or 1600, the sensor needs less light to provide a correct exposure.
If you don't increase the ISO in low light, a shutter speed fast enough to shoot handheld might not let in enough light for a correct exposure - increasing the ISO makes the sensor more sensitive, so the limited amount of light provided by the fast shutter speed (in other words, a short exposure) should be enough for a correct exposure.
Why is it so important?
Using high ISO settings used to mean loads of noise, and hence low-quality images, but modern Nikon DSLRs are capable of producing excellent-quality images at much higher ISOs than their predecessors.
This means that you can shoot in lower light while still using a faster shutter speed - perfect for avoiding both camera shake and blur due to subject movement.
However, despite these advances, there is still some drop-off in quality as you increase the ISO, so you should try to keep the ISO at the lowest setting that will still allow you to get the shot.
How do you use it?
When you're shooting in low light but want to use a fast shutter speed, set your SLR to shutter-priority mode to allow you to choose the shutter speed you need to freeze any movement. Now point your camera towards your subject and check whether the aperture display is constantly lit or flashing.
If it's constantly lit there's enough light to start shooting, but if it's flashing then you need to increase the ISO until it's constant.
Flashing indicates that the camera cannot achieve a correct exposure for the lighting conditions, but remember that if the light changes or the subject moves into a darker location, you'll need to watch out for the flashing aperture display again, and change the ISO to compensate.
What you can ignore: Expanded ISO settings
Most Nikon SLRs offer a range of ISO settings above the 'native' highest values. These are known as 'expanded ISO settings'.
These are best avoided in all but the most extreme shooting conditions, as along with increased noise, which shows up in the form of speckles on your photographs, using these settings can also lead to a greater risk of blown highlights and blocked-out shadows, as they often have a lower dynamic range than the normal ISO settings.
Taking it further: Auto ISO
Along with setting specific ISO values, Nikon DSLRs have an automatic ISO option. This is ideal if you want to make sure that the shutter speed doesn't drop too low in constantly changing lighting conditions, leading to blur from camera shake or subject movement.
In this situation you can set the ISO to auto, and in the set-up menu you can choose the highest ISO setting that you're comfortable with.
Essential Nikon camera settings: 10. White Balance
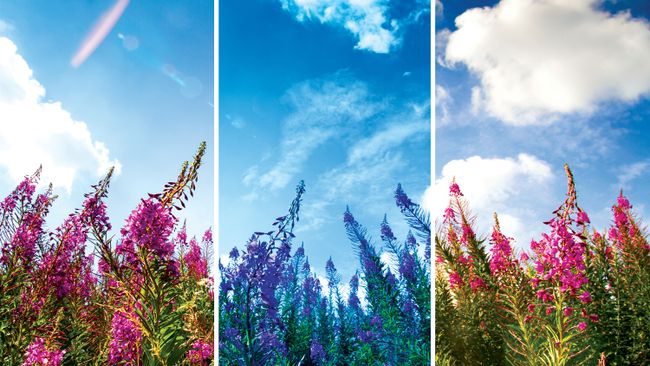
What is it in a nutshell?
The colour of the light from different light sources varies from the cool, blue tones of shade under a blue sky to the warm, orange colour of a sunrise or sunset.
The white balance setting on your Nikon allows you to compensate for the different colours of various light sources to make sure that the colours of your shots are accurate (in other words, so that whites actually look white, and don't appear slightly blue or yellow).
Why is it so important?
Even though you can change the white balance when you process your images (as long as you shoot in raw) it's still important to choose the right white balance when you take your shots.
At the very least it means you won't have to waste time changing it when you process your images. In addition, using the wrong white balance can also affect how colours are recorded.
For example, if you're shooting a sunset and use a warm white balance setting, such as Shade, it will boost the amount of orange and red in the shot.
This will shift the histogram to the right slightly, giving the impression that the photograph is over-exposed, whereas with a cooler white balance setting these tones would move a little to the left, so the image would actually be correctly exposed.
How do you use it?
The auto white balance setting on your Nikon can cope with a wide range of lighting conditions, but for more consistent results you can use one of the presets. These presets cover most lighting that you will encounter, including fluorescent and tungsten lighting, but there are some common light sources that don't have their own setting.
The most common is sunlight at sunrise or sunset - in these cases it's best to start by setting the white balance to daylight, and taking a test shot to check that the colour reproduction looks accurate.
What you can ignore: Manual colour temperature
In the white balance menu you can set the colour temperature, rather than using one of the presets. This can give an accurate white balance setting, but to set the colour temperature manually with any precision you'll need to use a colour temperature meter, which are expensive, and unnecessary for all but the most specialised uses.
Taking it further: Custom white balance
To create a custom white balance you need to place a sheet of white or grey card where the subject that you want to shoot is, in the lighting that you want to use. Fill the frame with this card and take a shot, ensuring that it isn't over-exposed.
You can then select the preset manual option from the white balance menu, pick the shot, and the camera will set the white balance to suit the lighting.
By N-Photo


Comments
Post a Comment